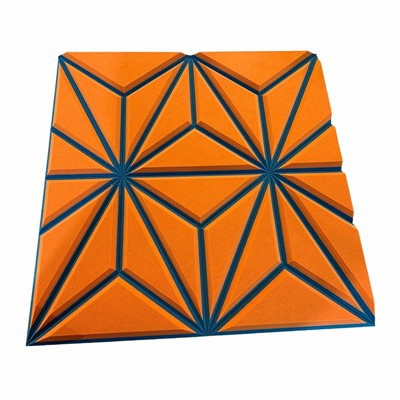

V Cut Panels, with their unique appearance and excellent acoustic performance, have become a popular choice for many interior decoration and noise - control projects. However, there may come a time when you need to remove them, whether it's for renovation, replacement, or reconfiguration. As a V Cut Panels supplier, I am here to share some comprehensive and scientific methods on how to remove V Cut Panels.
Preparation Before Removal
Before starting the removal process, it's crucial to gather the necessary tools and take precautions to ensure safety. The tools you'll likely need include a utility knife, a pry bar, a hammer, safety goggles, and work gloves. Safety goggles can protect your eyes from flying debris, and work gloves can prevent any cuts or abrasions on your hands.
Also, you should assess the installation method of the V Cut Panels. There are mainly two common installation methods: adhesive bonding and mechanical fastening. Knowing the installation method will help you determine the most appropriate removal approach.
Removal Steps for Adhesive - Bonded V Cut Panels
Step 1: Soften the Adhesive
If the V Cut Panels are installed with adhesive, the first step is usually to soften the adhesive. You can use a heat gun to apply gentle heat to the edges of the panels. Keep the heat gun moving constantly at a distance of about 6 - 8 inches from the panel to prevent overheating, which could damage the panel or the surrounding area.
As the adhesive warms up, it will become more pliable. You can test the softness of the adhesive by trying to insert the tip of a utility knife between the panel and the mounting surface. Once the adhesive yields slightly, you're ready to move on to the next step.
Step 2: Score the Adhesive
Use a sharp utility knife to carefully score along the edges of the V Cut Panel. This helps to break the bond between the panel and the adhesive. Make sure to score as close to the panel as possible without cutting into the mounting surface.
Step 3: Pry the Panel Off
Insert a pry bar or a putty knife under the edge of the panel where you scored the adhesive. Apply gentle pressure to lift the panel slightly. Be patient and avoid using excessive force, as this could cause the panel to break or damage the wall.
If the panel doesn't lift easily, reapply heat to the stubborn areas and try again. Gradually work your way around the edges of the panel, prying it loose bit by bit.
Step 4: Remove Residual Adhesive
After the panel is removed, there will likely be some residual adhesive left on the mounting surface. You can use an adhesive remover to clean it up. Apply the adhesive remover according to the manufacturer's instructions, usually by soaking a cloth in the remover and rubbing the adhesive residue until it dissolves. Then, wipe the surface clean with a damp cloth.


Removal Steps for Mechanically - Fastened V Cut Panels
Step 1: Locate the Fasteners
Mechanically - fastened V Cut Panels are typically held in place by screws or nails. Use a screwdriver or a nail puller, depending on the type of fasteners, to start the removal process. First, locate the fasteners. They are often hidden in the grooves or at the edges of the panel.
Step 2: Remove the Fasteners
If the panels are attached with screws, use a compatible screwdriver to unscrew them. Make sure to keep the screws in a safe place if you plan to reuse them or for replacement purposes.
If nails are used, place the nail puller near the nail head and apply pressure to lift the nail out. In some cases, the nails may be difficult to remove completely. You can use a hammer to gently tap the nail puller if necessary.
Step 3: Detach the Panel
Once all the fasteners are removed, the panel should come loose easily. Carefully lift the V Cut Panel away from the mounting surface. If there are any clips or brackets still attached to the panel, remove them as well.
Tips During the Removal Process
- Take Your Time: Rushing through the removal process can lead to damage to the panels, the mounting surface, or personal injury. Be patient and follow each step carefully.
- Protect the Surroundings: Cover the floor and nearby furniture with drop cloths to prevent any scratches or damage from falling debris or tools.
- Inspect the Panels: If you plan to reuse the V Cut Panels, inspect them for any damage during the removal process. Minor scratches or dents can sometimes be repaired, but more significant damage may make the panel unusable.
After - Removal Considerations
After removing the V Cut Panels, you may want to consider replacing them with other types of acoustic panels. We offer a wide range of acoustic panels, such as 3D Acoustic Panels, Slat Pet Felt Panels, Grooved Acoustic Panel, and Hexagon Acoustic Panels. Each type has its own unique design and acoustic properties, which can meet different aesthetic and functional requirements.
Contact Us for Procurement and Consultation
If you are interested in our V Cut Panels or other acoustic products, or if you have any questions about their installation, removal, or application, feel free to contact us. We are always ready to provide you with professional advice and high - quality products.
References
- Acoustics Handbook for Interior Designers, 2nd Edition
- Guide to Installation and Removal of Decorative Wall Panels