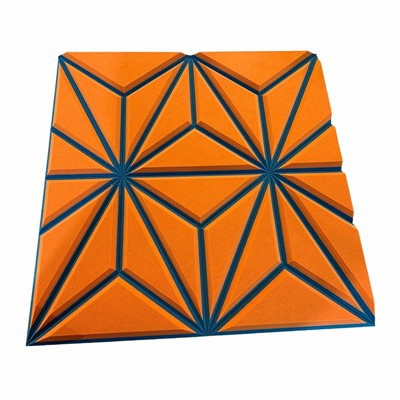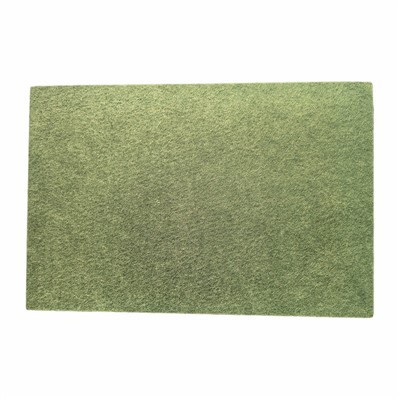

Alright, folks! Today, I'm gonna take you behind the scenes and share how V Cut Panels are made. I'm a supplier of these awesome panels, and I've seen the whole process up close. It's pretty fascinating, and I'm stoked to spill the beans.
First off, let me give you a bit of a rundown on what V Cut Panels are. These panels are super cool because of their unique V-shaped grooves. They're not just for looks - they also have some great acoustic properties. That means they can help reduce noise in a room, making it a more comfortable and peaceful place.
There are a few different types of acoustic panels out there, like Hexagon Acoustic Panels, Grooved Acoustic Panel, Slat Pet Felt Panels, and 3D Acoustic Panels. But today, we're focusing on V Cut Panels, which you can check out here.
Step 1: Choosing the Right Materials
The first step in making V Cut Panels is picking the right materials. We usually start with high - quality acoustic insulation materials. These materials are great at absorbing sound waves. Commonly, we use fiberglass, mineral wool, or acoustic foam. Each material has its own advantages.
Fiberglass is lightweight and has good sound - absorbing properties. It's also pretty affordable, which makes it a popular choice. Mineral wool is more fire - resistant than fiberglass, and it can handle high temperatures well. Acoustic foam, on the other hand, is very versatile. It can be cut and shaped easily, and it comes in different densities to suit various acoustic needs.
Once we've chosen the base material, we also need to think about the facing material. The facing can be made of different things like fabric, vinyl, or wood veneer. The facing not only gives the panel its appearance but can also affect its acoustic performance. For example, a fabric facing can help trap sound waves within the panel, enhancing its sound - absorbing capabilities.
Step 2: Preparing the Base Material
After we've got our materials sorted, it's time to prepare the base material. This involves cutting the insulation material into the right size panels. We use precision cutting machines to ensure that each panel is the correct dimensions. This is really important because if the panels aren't the right size, they won't fit properly when installed.
The cutting process has to be accurate. We measure and mark the panels first, and then the cutting machines do their magic. The machines use blades that are specifically designed for cutting through the insulation material cleanly. This helps prevent any fraying or uneven edges.
Sometimes, we also treat the base material at this stage. We might apply a special coating to make it more durable or to enhance its acoustic properties. For example, we could apply a fire - retardant coating to make the panel safer, especially in commercial settings.
Step 3: Creating the V Cuts
Now, here comes the fun part - creating the V cuts. This is what gives the V Cut Panels their distinctive look and also their acoustic edge. We use a special router or cutter that is designed to make V - shaped grooves in the panel.
The depth and width of the V cuts are carefully controlled. The depth affects how well the panel can absorb different frequencies of sound. Deeper cuts are generally better at absorbing low - frequency sounds, while shallower cuts work well for high - frequency sounds. We use computer - controlled routers to ensure that the cuts are consistent across all the panels.
The spacing between the V cuts also matters. If the cuts are too close together, the panel might become too weak structurally. If they're too far apart, it won't have the desired acoustic effect. We've done a lot of testing to find the perfect balance between spacing, depth, and width.
Step 4: Applying the Facing Material
Once the V cuts are made, it's time to apply the facing material. We use adhesives to attach the facing to the panel. The adhesive has to be strong enough to hold the facing in place but not so strong that it damages the base material.
First, we spread the adhesive evenly over the surface of the panel. Then, we carefully place the facing material on top, making sure it's smooth and free of wrinkles. We use rollers to press the facing down firmly, ensuring a good bond.
If the facing is a fabric, we might also need to sew or staple the edges to keep it in place. This gives the panel a finished look and helps prevent the facing from coming loose over time.
Step 5: Quality Control
After the panels are assembled, we go through a strict quality control process. We check each panel for any defects. We look for things like uneven V cuts, loose facing, or any damage to the base material.
We also test the acoustic performance of the panels. We use specialized equipment to measure how well the panel can absorb sound at different frequencies. This helps us make sure that each panel meets our high standards.


If a panel doesn't pass the quality control tests, we either fix it or discard it. We don't want to send out any sub - standard panels to our customers.
Step 6: Packaging and Shipping
Once the panels have passed all the quality control checks, they're ready to be packaged. We use sturdy packaging materials to protect the panels during shipping. We usually wrap the panels in plastic to keep them clean and dry, and then we place them in cardboard boxes.
We also label the boxes clearly with information about the panels, like the size, type, and quantity. This makes it easier for our customers to identify and install the panels when they receive them.
When it comes to shipping, we work with reliable carriers to ensure that the panels arrive at their destination on time and in good condition. We track the shipments so that we can keep our customers informed about the progress.
Why Choose Our V Cut Panels?
Our V Cut Panels are made with the highest quality materials and the latest manufacturing techniques. We've spent a lot of time and effort perfecting the process to ensure that our panels offer the best possible acoustic performance and aesthetic appeal.
Whether you're looking to reduce noise in a home theater, an office, or a commercial space, our V Cut Panels are a great choice. They come in a variety of colors and finishes, so you can find the perfect match for your decor.
Ready to Purchase?
If you're interested in our V Cut Panels or want to discuss your acoustic needs, don't hesitate to reach out. We're here to help you find the right solution for your project. Whether you need a small quantity for a DIY project or a large order for a commercial installation, we've got you covered. Feel free to get in touch and start the conversation about your purchase.
References
- Textbooks on acoustic engineering
- Industry reports on acoustic panel manufacturing
So there you have it, folks! That's how V Cut Panels are made. I hope you found this blog interesting. If you have any questions, leave a comment below.