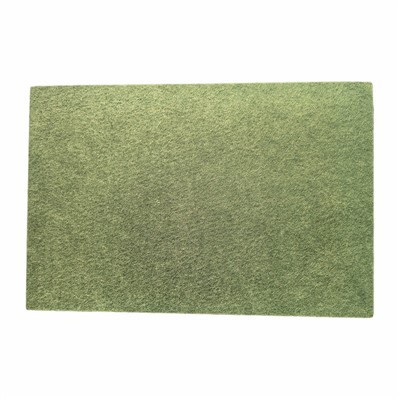

Hey there! I'm from an Acoustic Screen supplier, and today I'm gonna share with you how to install an acoustic screen. Whether you're looking to reduce noise in an office, create a more private space in a restaurant, or just make your home a quieter place, installing an acoustic screen can be a great solution.


Understanding Acoustic Screens
First things first, let's talk a bit about what acoustic screens are. Acoustic screens are designed to absorb sound waves and reduce noise levels. They come in different shapes, sizes, and materials, each with its own unique properties for sound absorption. You can check out our Acoustic Screen page to see the various options we offer.
Pre - Installation Preparation
Before you start installing an acoustic screen, you need to do some prep work.
- Measure the Space: Take accurate measurements of the area where you plan to install the acoustic screen. This will help you determine the size of the screen you need. Make sure to measure the height, width, and any irregularities in the space.
- Choose the Right Screen: Based on your measurements and the specific needs of your space, select the appropriate acoustic screen. Consider factors like the level of noise reduction required, the aesthetic appeal, and the durability of the screen. We also offer Acoustic Partition and Acoustic Lighting options that can complement your acoustic screen installation.
- Gather Tools: You'll need a few basic tools for the installation. These may include a drill, screws, a level, a measuring tape, and a screwdriver. Make sure all your tools are in good working condition before you start.
Installation Steps
Step 1: Mark the Installation Points
Using your measuring tape and a pencil, mark the points on the wall or floor where you'll be installing the acoustic screen. If you're installing it on the wall, make sure the marks are level. You can use a level to ensure accuracy.
Step 2: Drill Holes
Once you've marked the points, use a drill to create holes in the wall or floor. The size of the holes will depend on the type of screws you're using. Make sure to drill the holes at the correct depth to ensure a secure fit.
Step 3: Attach the Mounting Brackets
Insert the screws into the holes and attach the mounting brackets to the wall or floor. Make sure the brackets are firmly attached and level. You may need to use a screwdriver to tighten the screws.
Step 4: Hang the Acoustic Screen
Carefully lift the acoustic screen and align it with the mounting brackets. Slide the screen onto the brackets and make sure it's properly seated. If the screen has multiple panels, you may need to connect them together according to the manufacturer's instructions.
Step 5: Check for Stability
Once the screen is installed, give it a gentle shake to check for stability. If it feels loose, tighten the screws or adjust the brackets as needed. Make sure the screen is level and straight.
Tips for a Successful Installation
- Work with a Partner: Installing an acoustic screen can be a two - person job, especially if the screen is large or heavy. Having a partner to help you lift and position the screen can make the installation process much easier.
- Follow the Instructions: Always read and follow the manufacturer's installation instructions carefully. Each acoustic screen may have specific requirements, and following the instructions will ensure a proper installation.
- Test the Sound Absorption: After the installation is complete, test the sound absorption of the screen. You can do this by making some noise in the room and listening to how the screen affects the sound. If you're not satisfied with the results, you may need to adjust the screen or consider adding additional acoustic materials.
Maintenance and Care
Once your acoustic screen is installed, it's important to take care of it to ensure its longevity.
- Clean Regularly: Use a soft, dry cloth to clean the screen regularly. Avoid using harsh chemicals or abrasive materials, as these can damage the screen.
- Inspect for Damage: Periodically inspect the screen for any signs of damage, such as tears or loose parts. If you notice any damage, repair or replace the screen as soon as possible.
Why Choose Our Acoustic Screens
Our acoustic screens are made from high - quality materials that offer excellent sound absorption. We have a wide range of options to choose from, so you can find the perfect screen for your needs. Whether you're looking for a simple, functional screen or a more decorative one, we've got you covered.
If you're interested in purchasing an acoustic screen or have any questions about the installation process, don't hesitate to get in touch. We're here to help you create a quieter, more comfortable space.
References
- General knowledge about acoustic screen installation from industry experience.
- Product specifications and installation guides provided by the acoustic screen manufacturers.